 RSS Feed
 Twitter
 06:02
06:02
 Executive Republic
culled from:http://youqueen.com
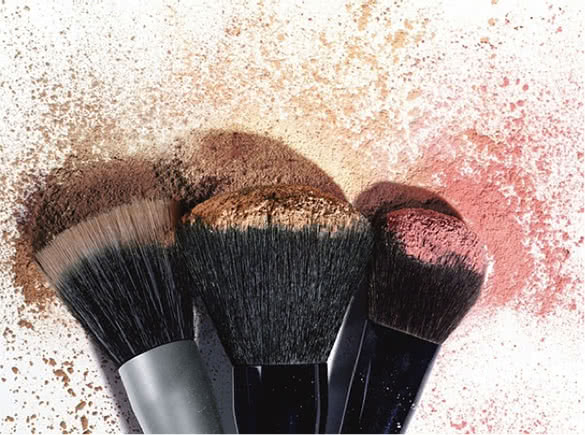
Want to know the key to flawless skin and perfect makeup? It’s all in the makeup brush! While your makeup brush might not be able to actually clear up your skin, a clean brush will prevent breakouts. So, you might want to find out how to clean makeup brushes without ruining them.
A good quality brush can also help to gloss over any less-than-perfect spots on your face. While pro quality makeup brushes might not magically impart you with a pro makeup artist, a decent brush is critical to a decent application.
The importance of cleanliness
Source: via trendisu.com
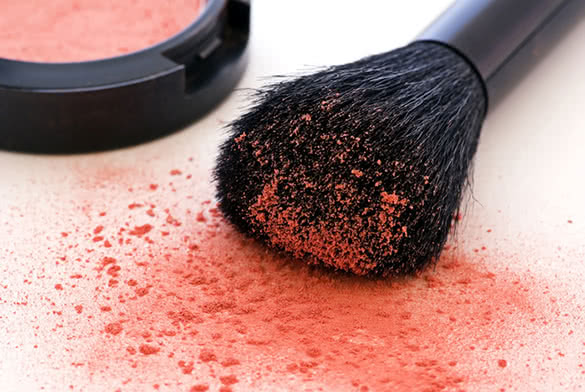
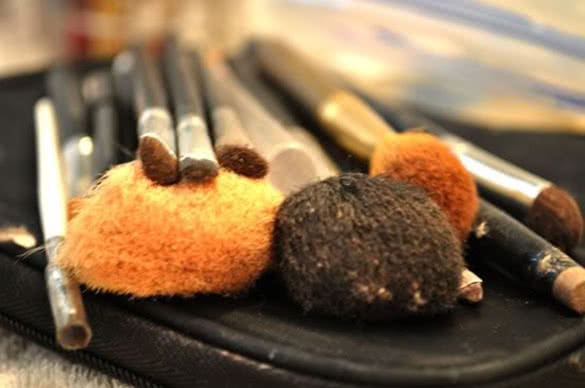
Beyond messing up your application, dirty makeup brushes can do some serious damage to your skin. Every time that you use your makeup brushes, they get more and more build-up.
Every bristle slowly gets caked over with oil and dead skin. The longer that the reside sits on your brush, the more bacteria that you’ll have. Every time that you use a dirty makeup brush, you’re spreading the bacteria all over your face. Pretty gross, huh?
On top of being just plain dirty, that bacteria will cause breakouts. This is a serious issue for a lot of us.
You can have the most amazing skincare routine in the world, but it’s not going to do you any good if you are smearing dead skin cells and bacteria all over your face every day.
This is an even bigger deal for women with sensitive skin. Hard bristles and old makeup are just the recipe for irritation.
How often you’ll need to clean your makeup brushes
Source: via vildamagazine.com
While all makeup pros agree that cleaning is a must, there is some dispute on how often you really need to do it. Some people do it once a week while others go for once a month.
Nobody is recommending that you go for more than one month though, so let’s keep that as the bare minimum. Of course, your particular schedule will depend on how often you use each brush.
As a general rule, it’s time to wash your makeup brush when it stops feeling soft or anytime there is visible caked-on makeup. It’s alright to just wipe them off between uses, but eventually, the residue will stop wiping away. That’s when you need to pull some cleaner into the mix.
Bobbi Brown recommends a more detailed plan of attack. This is the ideal schedule according to her:
WASH LIST
Source: via dropdeadgorgeousdaily.com
Wash twice a month: Eyeliner and eye shadow brushes
Wash once a month: Eyebrow, lip liner brushes
DIY brush cleansing options
Source: via lipstickandchiffon.blogspot.com
Using soap meant for your skin or dirty dishes can dry out bristles. It’s not going to ruin your brushes, but it’s not great for natural fibers. If you want something cheap and easy, go for baby shampoo. It’s gentle, but effective.
If you need something a little more heavy duty for eyeliner and brow brushes, grab some olive oil. It’s total overkill for most brushes, but it’s exactly what you need for sticky gel formulas. Of course, this will be a waterless method so just dab a drop of oil on your brush then gently swirl it over a cloth or paper towel. Keep going until the brush stops leaving a mark.
The cleaning process
Want the cheap and easy DIY route to cleaning your makeup brushes? All you’ll need is some baby shampoo, water, and a light colored towel. Ready? Here’s a step by step guide to getting pristine makeup brushes.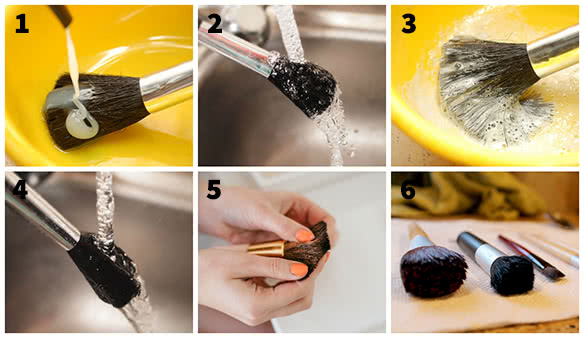
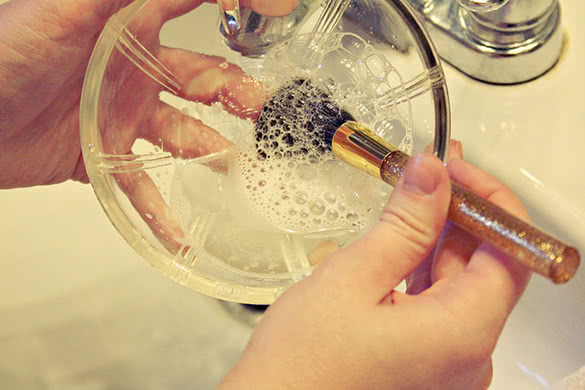
Step one: Pour a tablespoon of baby shampoo into a small bowl of lukewarm water. There’s no exact science here, so don’t worry about getting a perfect blend. The only important thing is to keep the shampoo at a minimum. If you get a little too squeeze-happy, you’ll end up with a sticky residue.
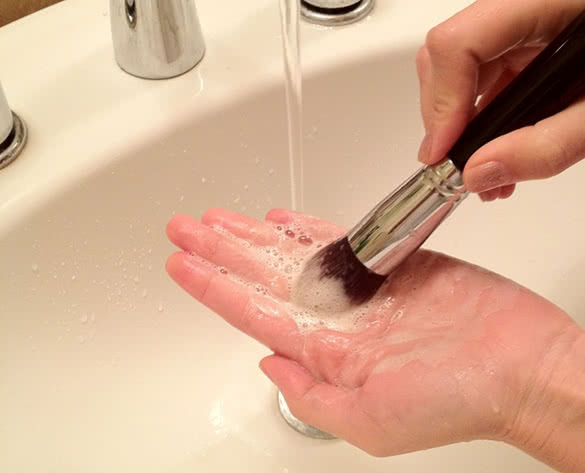
Step two: You’ll be working one brush at a time so grab your first one. If it’s visible dirty, hold it under running water to get some of the product off. Once it’s relatively gunk-free, dip it into the water.
Step three: Holding your brush under water, slowly swirl it over the bottom of the bowl. Make gentle circles against the bowl for about ten seconds. Be careful not to get the entire brush wet. If you get water at the base of the bristles it can loosen up the glue and lead to a mess. You only use the tip so just clean the tip.
Step four: Once you’ve swirled the brush around the bowl for a while, hold it under cold water for a few seconds. The water pressure will rinse away any remaining product.
Step five: Use your fingers to gently mold the brush back into its original shape.
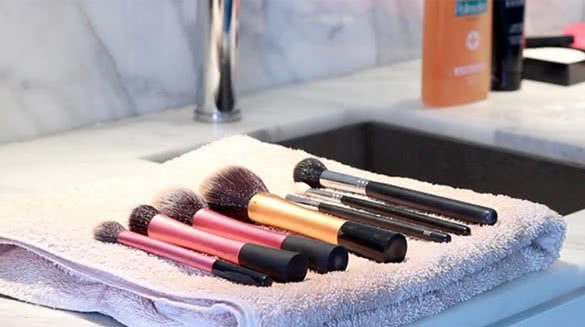
Step six: Once it is washed and rinsed, lay the brush down on a clean, flat towel. It’s important to leave them lying flat. If you let the water collect around the handle you can mess up the glue and cause rust. A flat bed is the simplest option but you can speed up your drying time a bit by taking it to the next level.
There is an entire, fantastical world of brush drying racks out there. You can grab one at a beauty supply store or make your own. You can find inspiration for some seriously elaborate DIY solutions or just go for a simple impromptu rack.
Want the easy option? If you have a bar-style towel rack, all you need is a hair tie or a rubber band. Hold your brush next to a bar with the head pointing down toward the floor. Insert your brush into the hair tie or rubber band then loop it over a towel rack and hook it back on the brush handle (it’s easier than it sounds!).
Store-bought cleansers
There are tons of great makeup brush cleansers out there, so you definitely don’t need to use baby shampoo if you don’t want to. While they are a bit pricey, store-bought brush cleansers come with one major perk: NO drying time! The overnight wait can be a total deal breaker for many of us so don’t do it if you don’t want to.If you want something quick and simple, go for a spray. Makeup cleaning sprays are foolproof and will instantly cleanup your act. Ready to get started? You’ll just need your spray and a towel. A paper towel works or you can grab a clean, light colored hand towel.
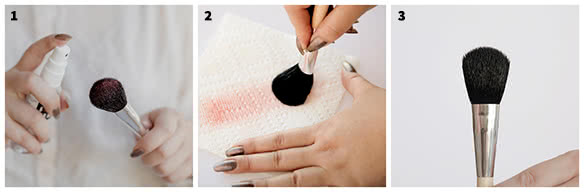
Step one: Spray your makeup brush until the bristles are totally soaked. They don’t need to be dripping wet, but you definitely don’t want to end up missing any dry spots either.
Step two: Once your makeup brush is soaked, grab your hand towel or paper towel. Gently rub your brush back and forth over the towel. Keep doing it until you’re no longer leaving a mark. Of course, this is the reason why light colored towels are important. If you use a cleaning towel that is too dark, you’ll never really know when you are done.
Step three: Let your brush dry. This will be an incredibly fast process. Typically, cleansing sprays dry in less than five minutes so by the time you are done cleaning all of your brushes, the first few that you washed will already be ready to go.
ATTENTION GERMOPHOBES: If you want to take your cleaning routine to the next level, attack the handles. It might seem like overkill to some people, but anything that you touch on a daily basis should be cleaned at some point.
While they can’t be cleaned with water, alcohol is a simple fix. Just put a little rubbing alcohol onto a paper towel and rub it over your brush handle. Voilà! Your entire brush is bacteria free.
Spas for your makeup brushes
Source: via oneclickbeautycare.com
If your makeup brushes are feeling a bit dry, give them a conditioning bath. You’ll use the exact same procedure that you did for the DIY baby shampoo bath, but this time, you can use conditioner. Just set up two separate bowls and move your brushes from the shampoo bath into the conditioning bath, then leave them out to dry.
Have pro quality brushes? If your brushes are labelled with an identifying number, apply a thin coat of clear nail polish to make that number last forever. It’ll come in handy when you want to replace it or get brush advice.
When to toss
No matter how well you clean your brushes, they won’t last forever, so it’s important to know when to say goodbye to an old batch!Bristles that are falling out, frayed or misshapen are probably reaching the end of their lifespan. It’s important to throw your makeup brushes out at this point. It is just too frustrating to try to do a decent job with broken tools. You’ll never really end up with the look that you want.
Source: via blushcompass.com
A word on beauty blenders and sponges
Makeup brushes aren’t the only thing that you should clean! As a general rule, if it touches your face, you should clean it. Because beauty blenders and sponges are regularly being rubbed across your face, it’s incredibly important to keep them clean.If you are using your sponge or blender on a daily basis, it’s good to aim for a weekly cleaning. Sponges and blenders are one of the biggest causes of breakouts so it’s well worth the effort.
There are a few different ways that you can clean beauty sponges and blenders. Of course, you can head over to your local beauty supply shop and they’ll have something designated for that purpose. Or, as always, you can go for the DIY route.
Since sponges and blenders are less susceptible to drying out, you can go for pretty much any mild soap. Ready to get cleaning?
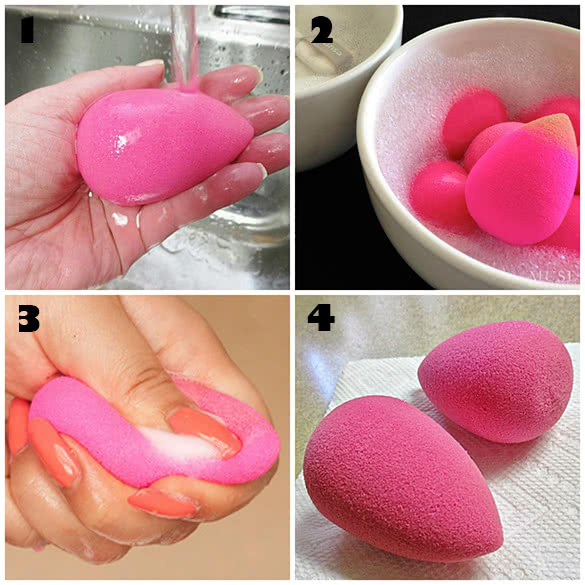
Step one: Hold your sponge/ blender under lukewarm running water for a few seconds. Squeeze it a few times to keep the water moving through it.
Step two: Squeeze your sponge/ blender one last time after you remove it from the water. Apply a dime size amount of soap.
Step three: Put the sponge/ blender back under running water. Keep squeezing it until the water is running clear underneath it.
Step four: Lay it out on a flat, clean towel. Leave it to dry for a couple of hours.
Know yourself
When it comes to anything skincare related, it’s important to pay attention to your body. If you start washing your brushes or sponges with a certain type of cleanser and your skin freaks out, change your routine! It’s incredibly common to have a bad reaction to different types of cleaning agents (natural or synthetic) so pay attention to your skin.
Source: via mag4style.com
Be honest
While it’s important to use clean brushes, some of us are just never going to get around to these cleaning routines. That’s totally okay! Just take that into consideration when you pick out your supplies. Put your foundation on with a disposable sponge rather than a brush that needs to be cleaned.Pick up a ton of cheaper brushes so that you do one massive cleaning a few times a year rather than going for a few “investment” brushes that will require regular cleaning. Ultimately, whatever method you’ll actually use is the best one.
 Posted in
0 comments:
Post a Comment